
This document outlines the AEM Forms Designer, and it uses methods, such as tree structures within the hierarchy pane, to expose parent-child relationships, rather than rely on visual location to imply meaning. Shape, size, and orientation are not used to imply meaning.
Pre-requisites
You require the following software and minimum hardware to install and configure Designer:
- Microsoft® Windows® 2016 Server, Microsoft® Windows® 2019 Server, or Microsoft® Windows® 10
- 1 GB of RAM for 32-bit or 2 GB of RAM for 64-bit OS
- 16-GB disk space for 32-bit or 20-GB disk space for 64-bit OS
- Graphics memory - 128 MB of GPU (256 MB recommended)
- 2.35 GB of available hard-disk space
- 1024 X 768 pixels or greater monitor resolution
- Video hardware acceleration (optional)
- Acrobat Pro DC, Acrobat Standard DC, or Adobe Acrobat Reader DC.
- Administrative privileges to install Designer.
Install Designer
- To install Designer, perform the following steps:
- Download Designer from Software Distribution.
- Double-click setup.exe to run the installer
- Proceed and provide your details on the Personalization screen.
- If you accept the license agreement, click Next to proceed.
- (Optional) change the default installation path to install Designer at a location of your choice. Click Next.
- Click Back to change any preferences. To install Designer, click Install.
- Click Finish when the installation completes.
Layout Design
Perform the following steps to use subform in an XDP template:
Create the layout in form designer It can contain typical form fields such as "Name" and "Phone Number".
- Open the Forms Designer, select File > New > Use a blank form, tap Next, and then tap Finish to open the form for template creation.
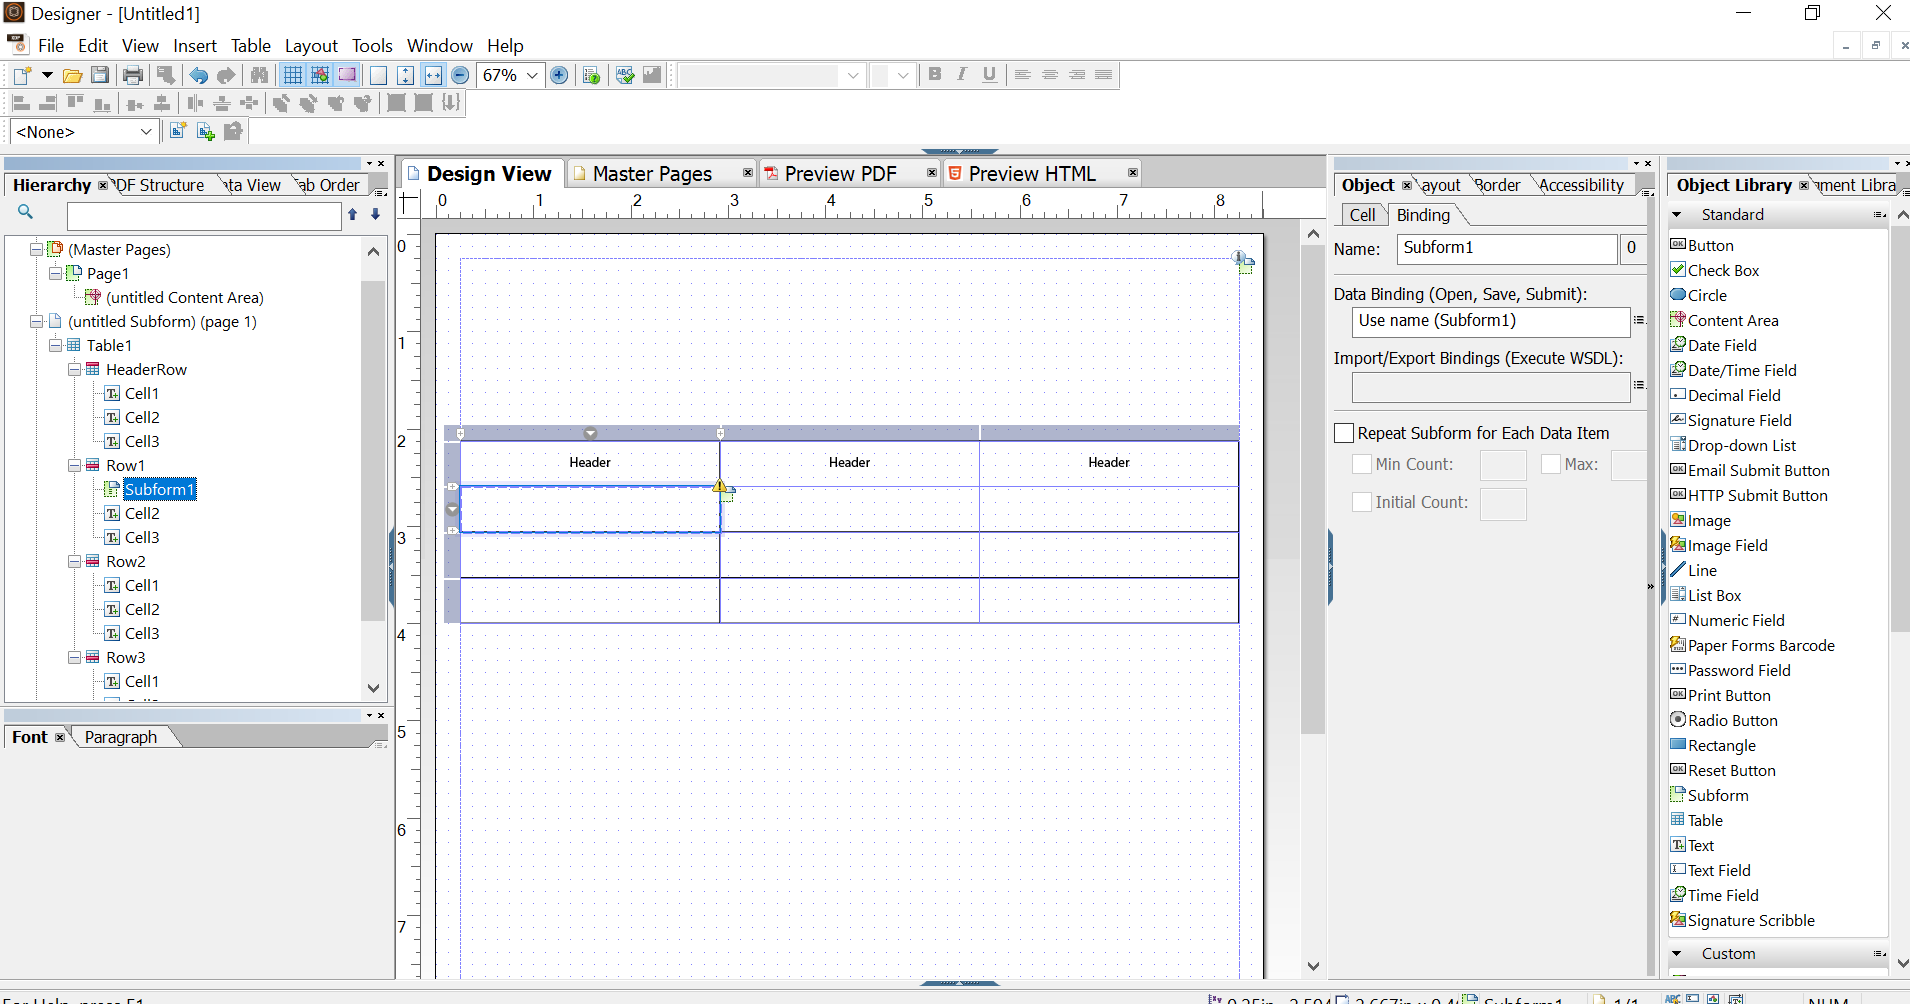
- Drag-and-drop the Subform component from the Object Library to the form.
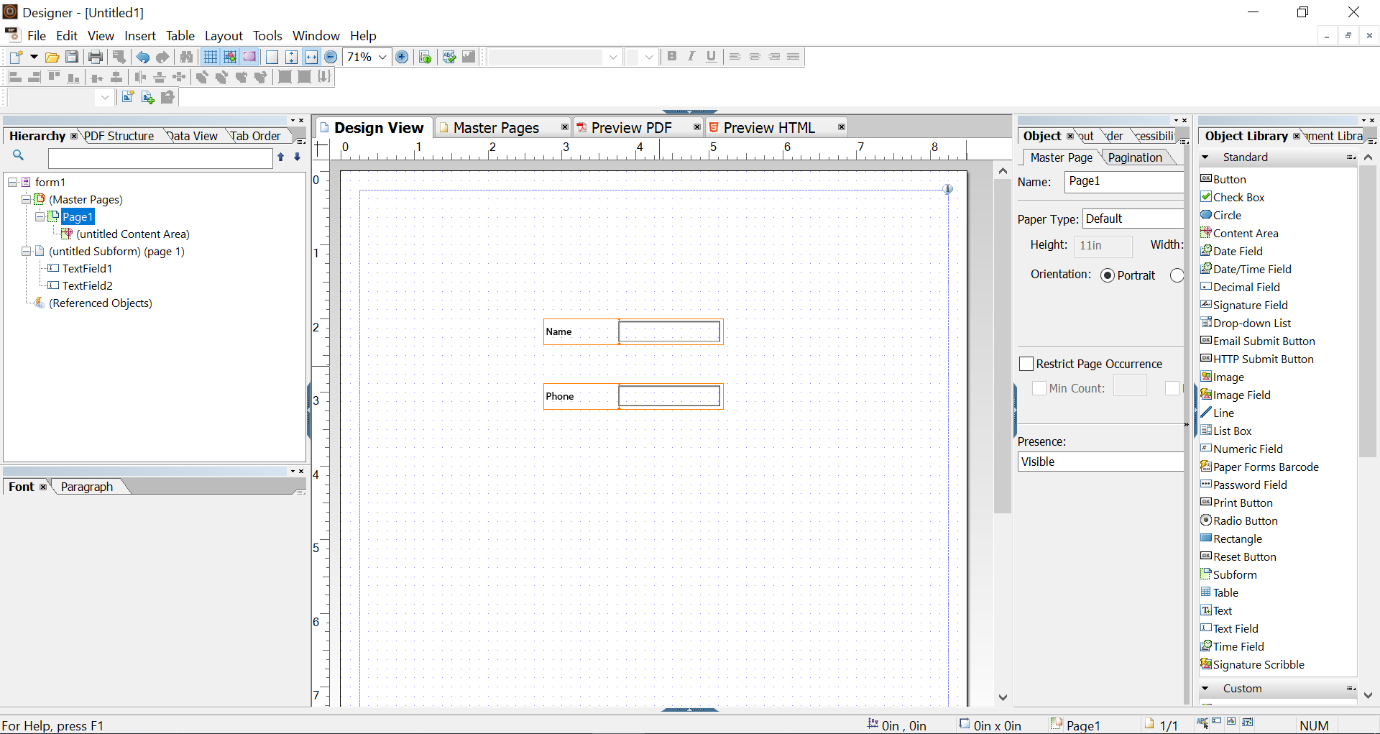
- Select the Subform tab and select Flowed from the Content drop-down list. Drag the left endpoint of the subform to adjust the length.
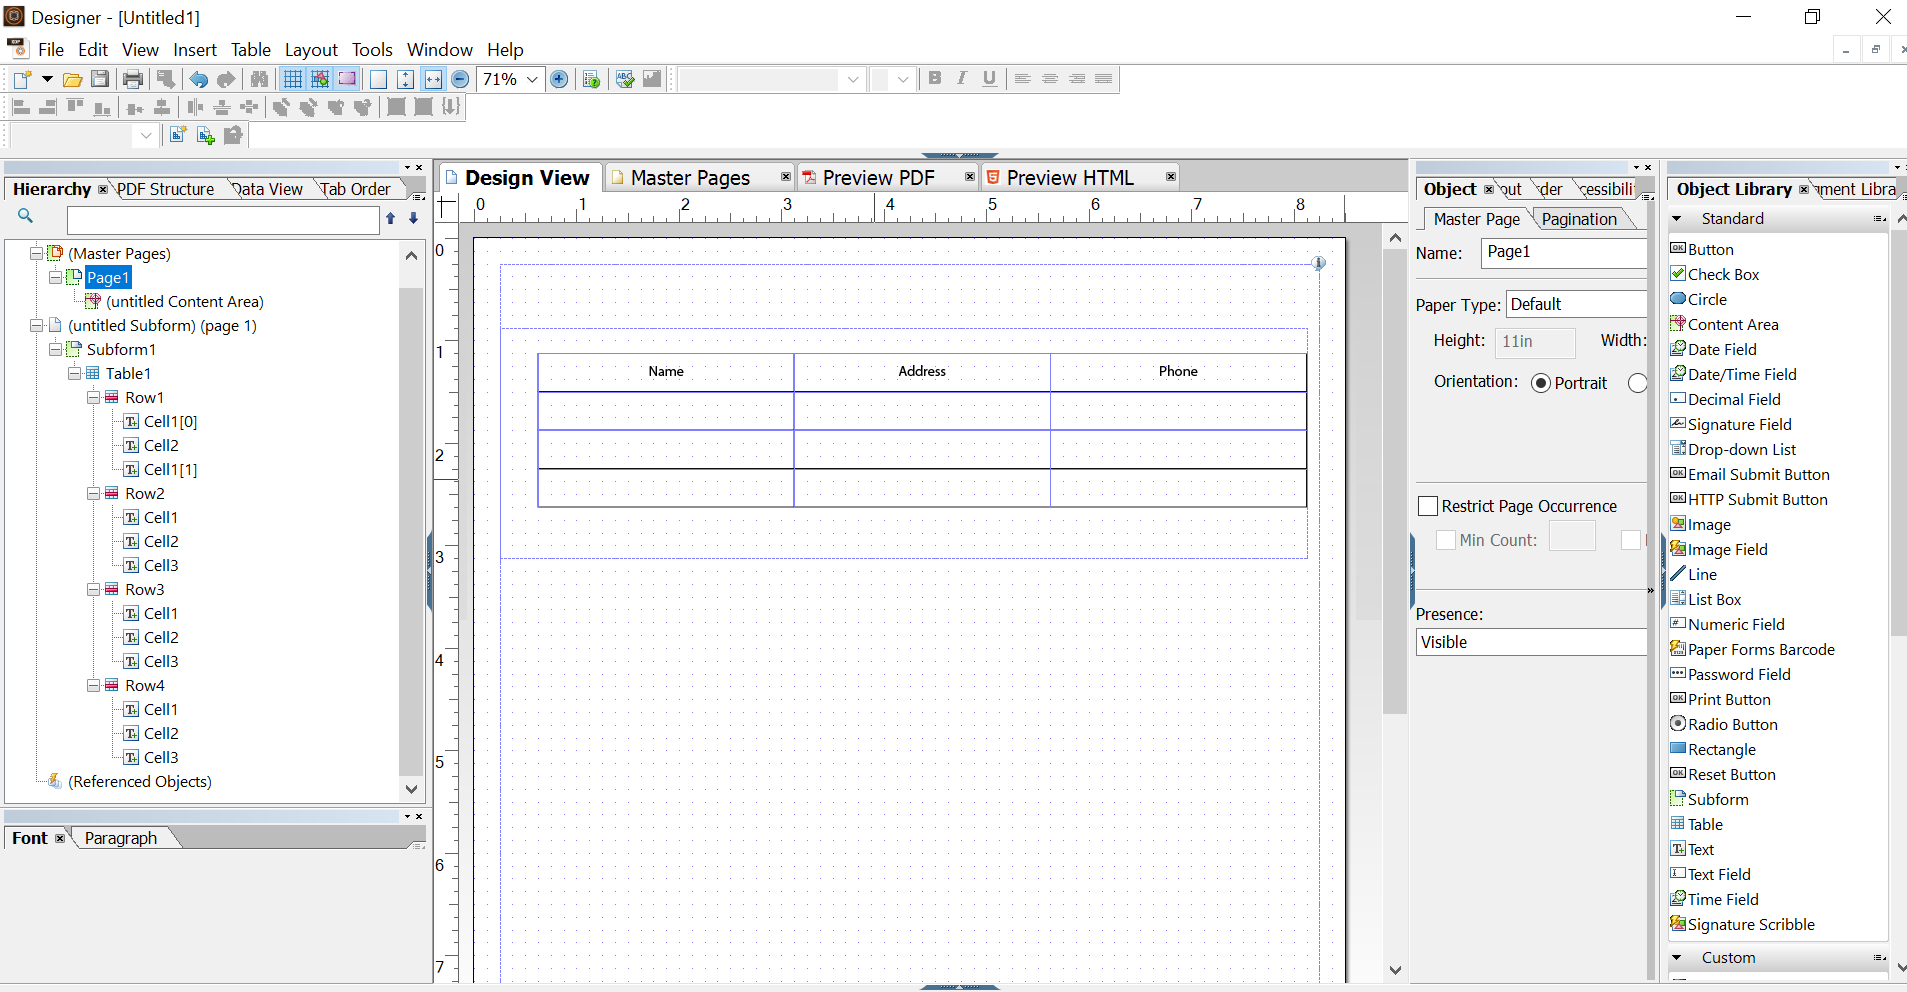
Steps to use the Table component in the subform
- Drag-and-drop the Table component from the Object Library to the form.
- In the Insert Table dialog:
- Specify the number of rows and columns for the table.
- Tap OK.
- Tap + in the left pane next to the name of the table, right-click cell names included in the header and other rows, and select Rename Object to rename the table cells.
- 4. Drag-and-drop the Text Field component from the Object Library to each table cell in the Design View. Perform this step to be able to bind table cells with the form data model.

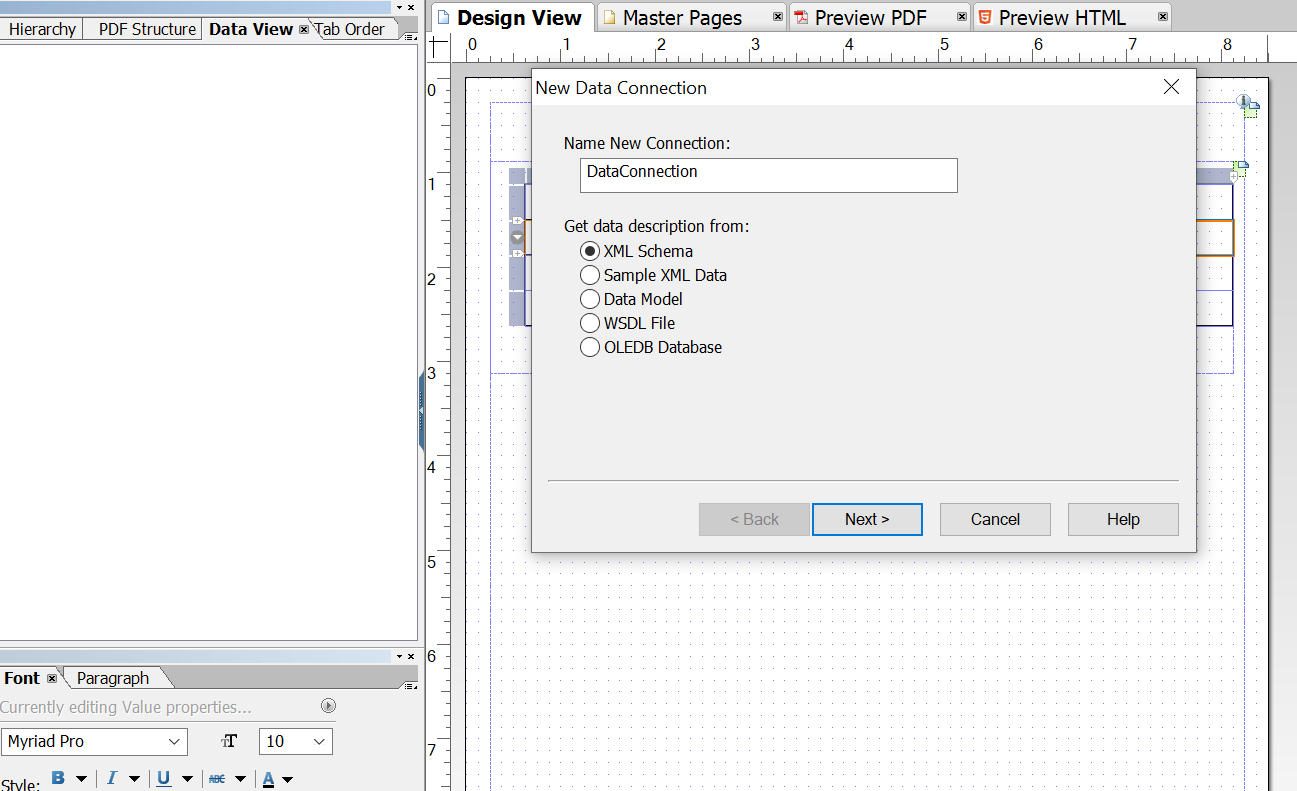
Steps to create the Data Connection
- Select File > New Data Connection.
- Select XML Schema and click Next.
- Click Browse and search for and select the XML schema file.
- Type or paste the URL location of the XML schema file into the Select XML Schema File field.
- Click Finish. The data schema appears in the Data View Tab.
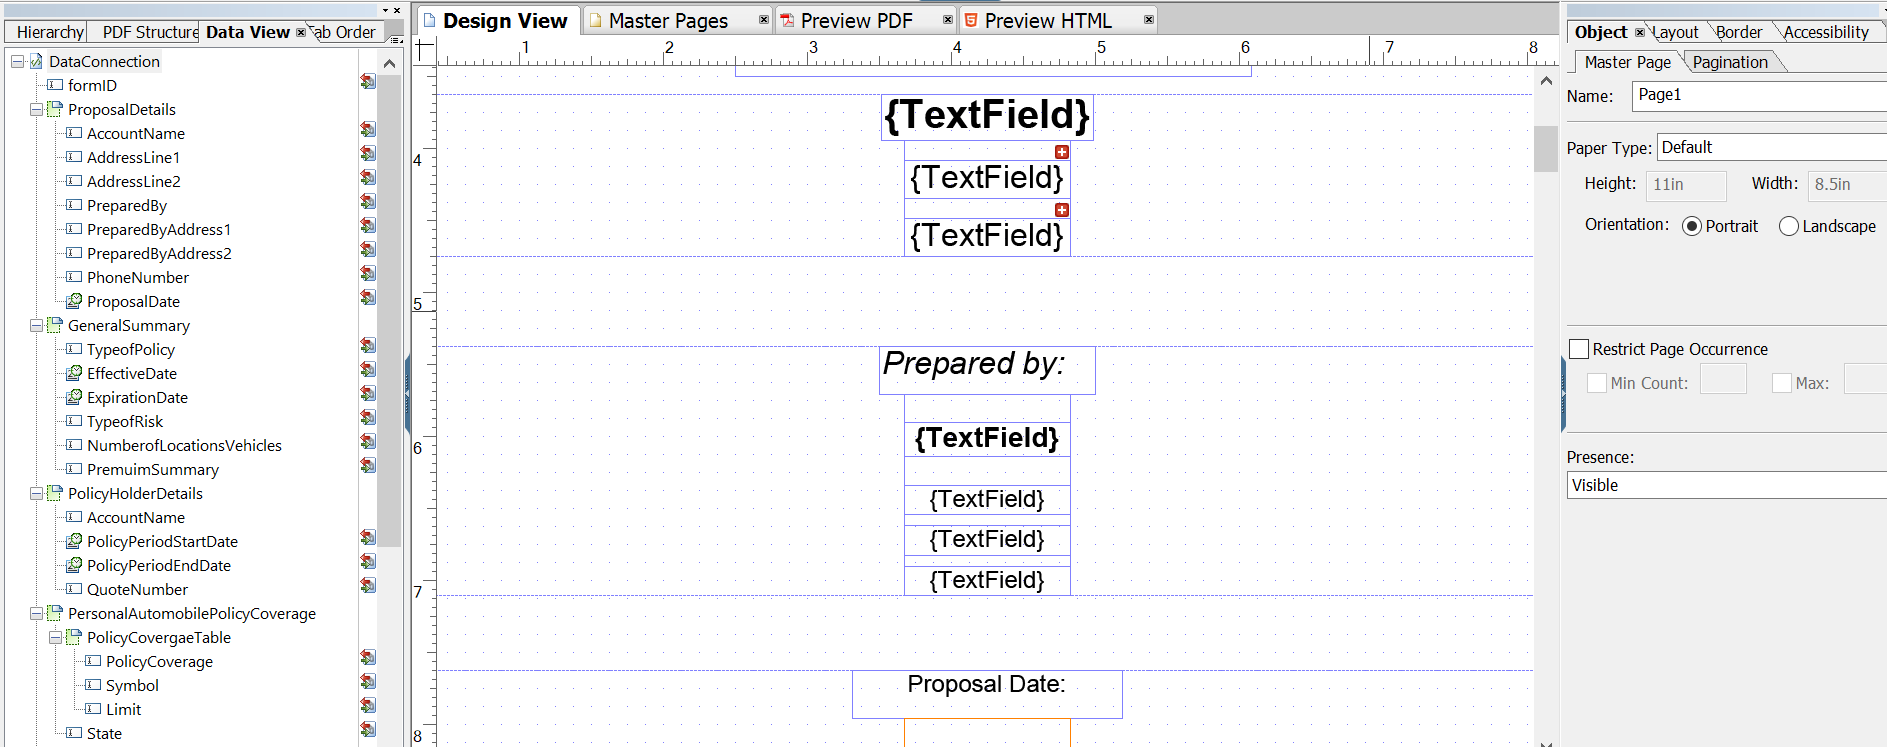
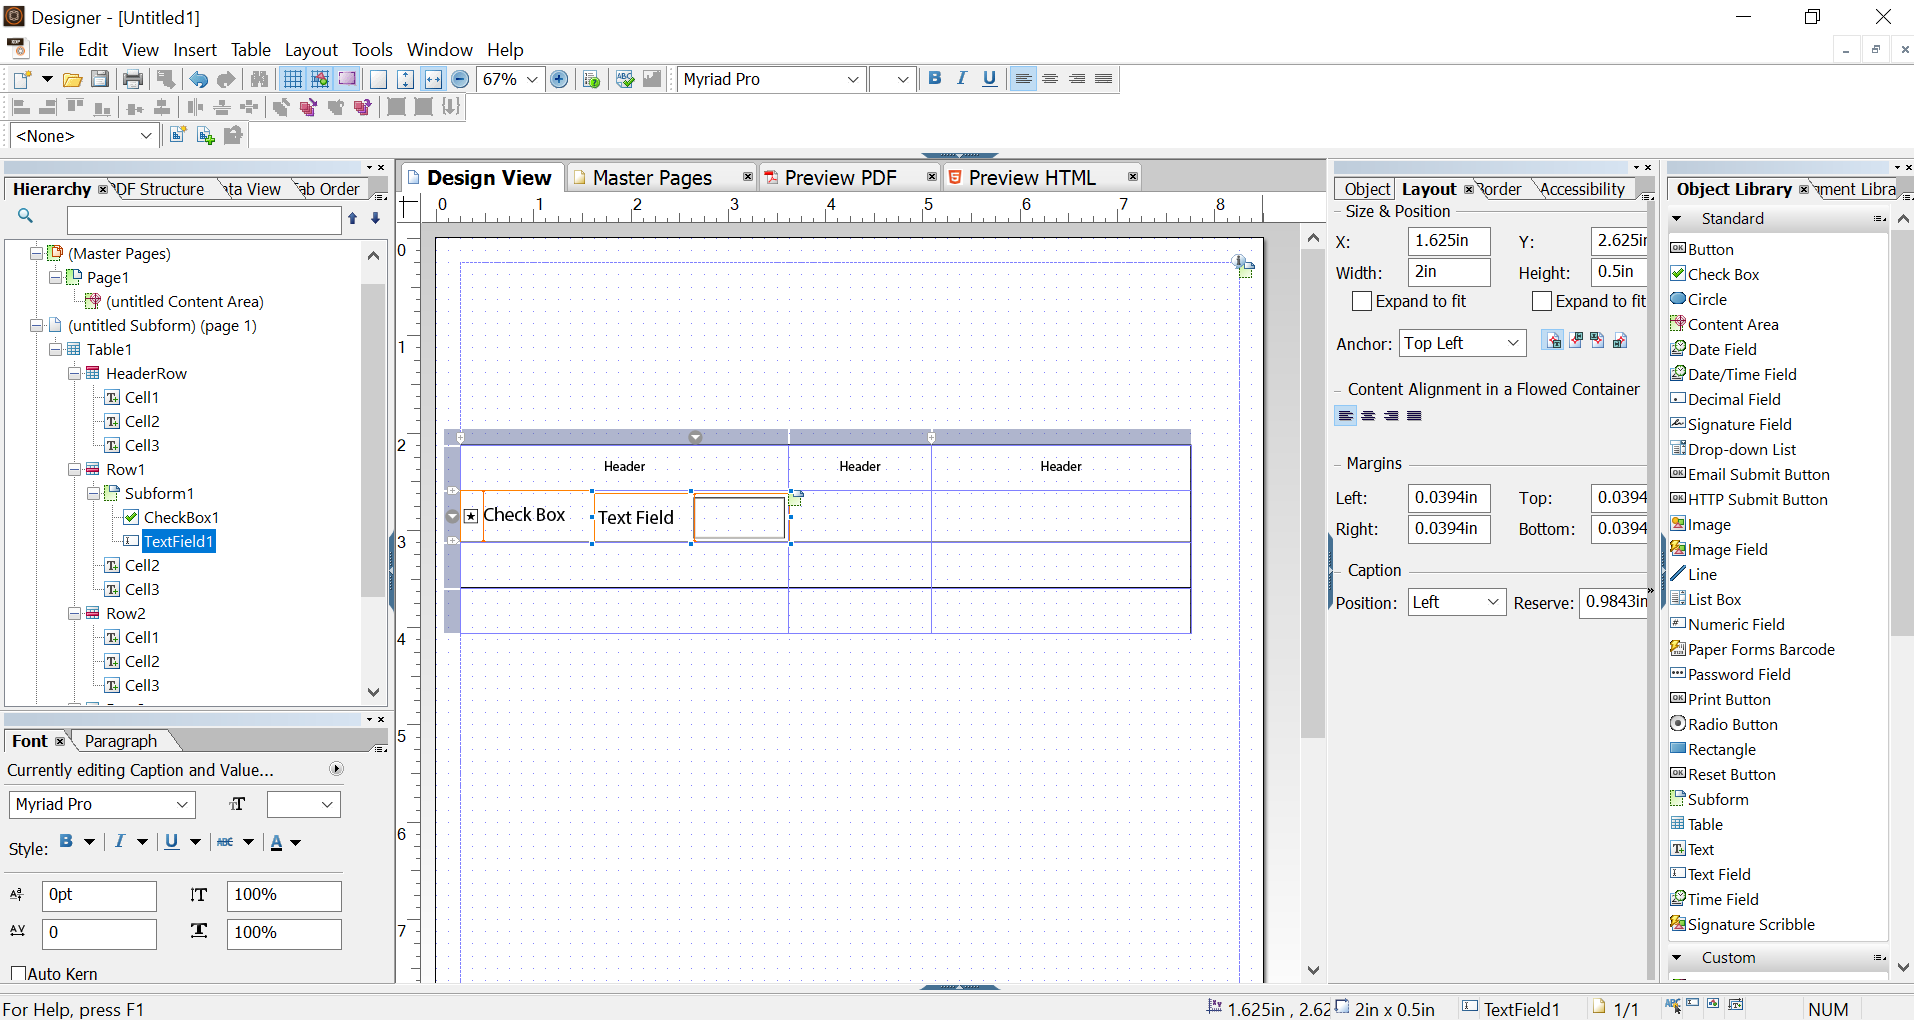
Steps to insert the multiple objects in a table cell
- Drag-and-drop the Table component from the Object Library to the form.
- Drag-and-drop the subform in a table cell.
- Drag-and-drop any component from the Object Library to the subform.
- We can bind all the components.
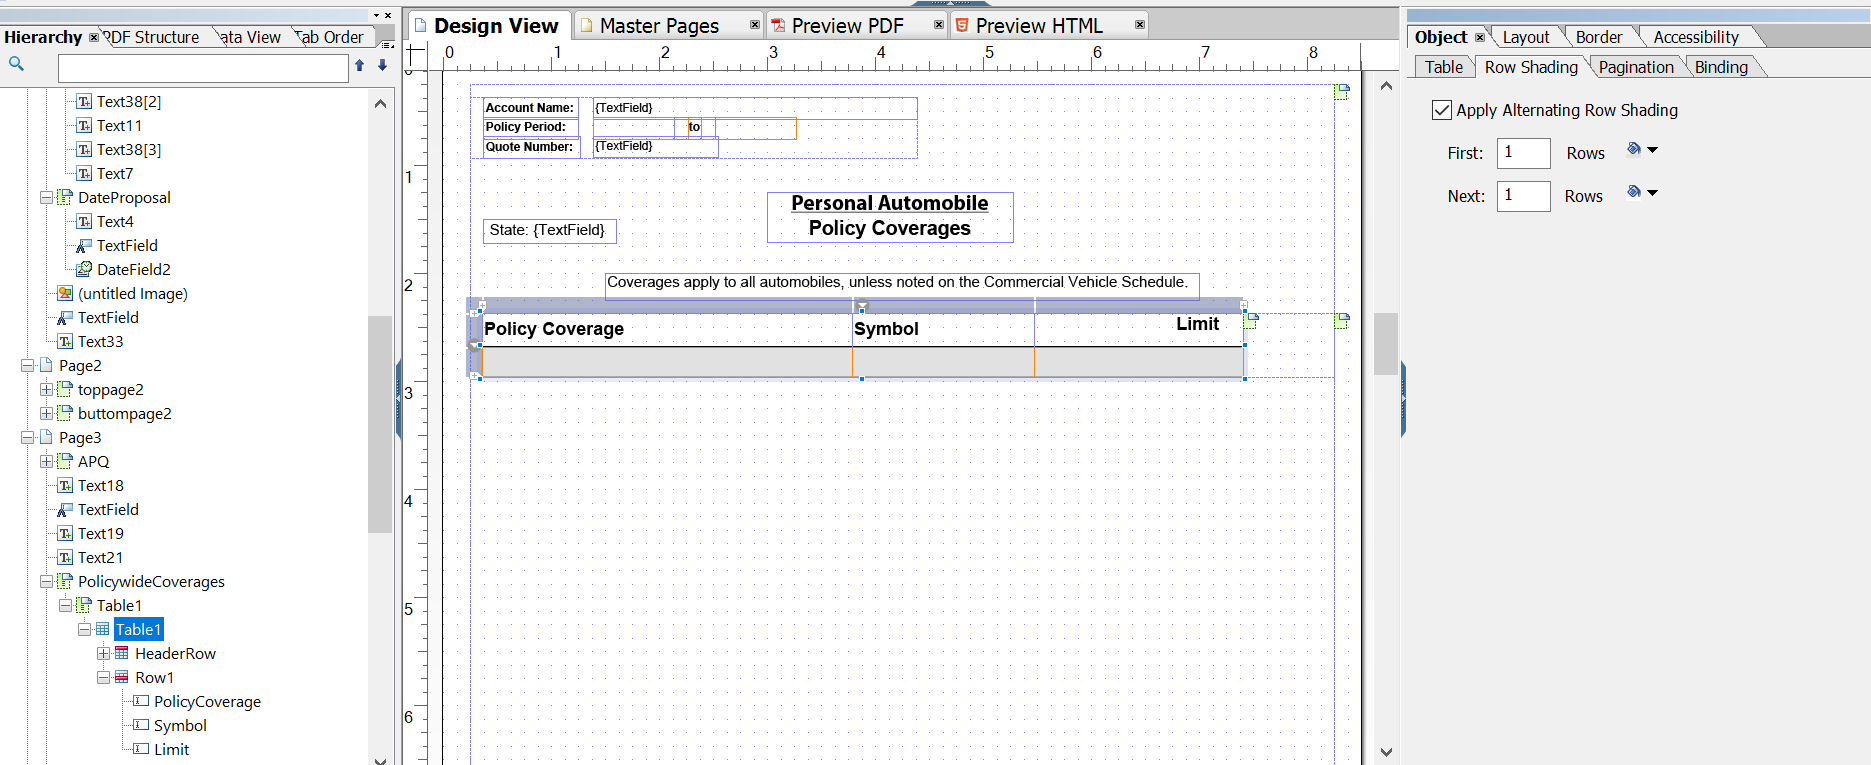
Steps to change the border & shading of a table
(You can edit the borders individually or together)
- Select the object and click shading tab and apply the shading.
- Select the object and click border tab and edit the borders individually or together.
- Save the changes.
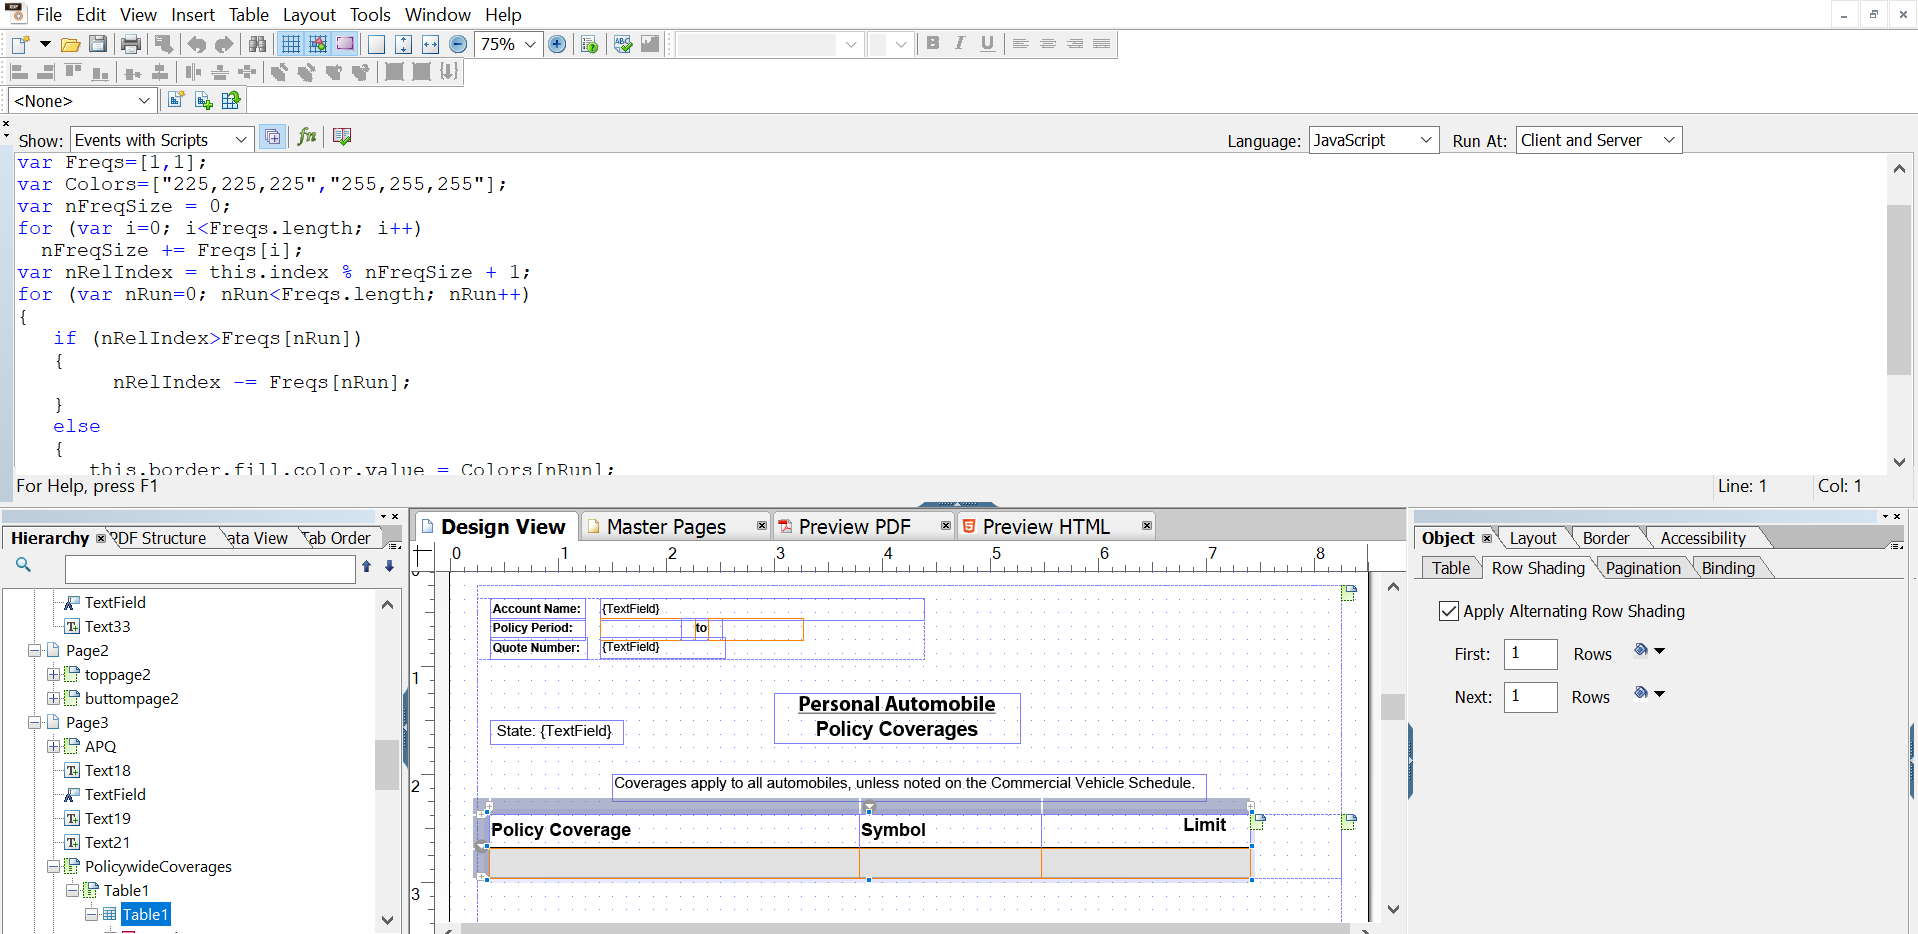
Steps to apply Scripting
- Select File > Form Properties.
- Click the Defaults tab.
- In the Default Language list, select the default scripting language for the currently displayed form.
- Select Window > Script Editor and apply scripting.
Also Read
adobe-design-xsd-xml-schema-definition-xml

Nitin is an accomplished Adobe Digital Professional having extensive experience in Customer Success & Centricity. He is a Digital Strategic & Transformation expert whose focus is to transform customer Digital Experience , As an IT Leader he ensures an interactive and collaborative way of digitizing the communication across channels. He has worked as a trusted advisor for the board level executives and stakeholders. He is in managing and delivering high-end solutions across geographies and industries for business partners and stake holders. He is having mindset with blend of business and sales experience to up-sell and cross-sell opportunities through the engagement to generate pipelines.
Related reads

About Coforge
We are a global digital services and solutions provider, who leverage emerging technologies and deep domain expertise to deliver real-world business impact for our clients. A focus on very select industries, a detailed understanding of the underlying processes of those industries, and partnerships with leading platforms provide us with a distinct perspective. We lead with our product engineering approach and leverage Cloud, Data, Integration, and Automation technologies to transform client businesses into intelligent, high-growth enterprises. Our proprietary platforms power critical business processes across our core verticals. We are located in 23 countries with 30 delivery centers across nine countries.