
In this post, we will explain setting up Code pipeline using cloudformation templates. In this case, we will be using S3 bucket to store template or you may use repository of your choice.
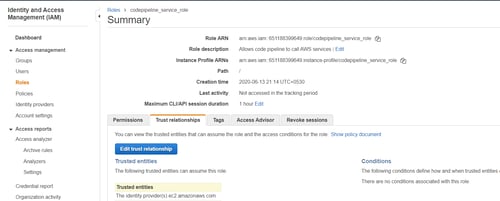
Your first step will be creating one custom and one default role in your IAM console. These roles will be created specifically for CodePipeline to access your other AWS services.
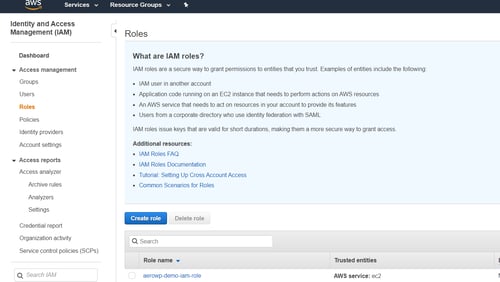
Keep in mind that there is no CodePipeline role provided by AWS, but we can select EC2 and customize the role for this case.
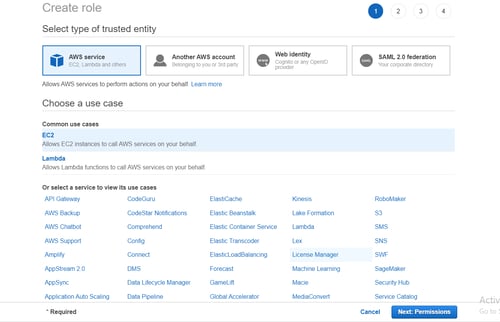
Our next step is to create permissions, here you can mention any tags you may need before creating your role.

Once this role is created, we can then attach our custom inline policy which is given below.
The inline policy:
{
    "Statement": [
        {
            "Action": [
                "S3:GetObject",
                "S3:GetObjectVersion",
                "S3:GetBucketVersioning"
            ],
            "Resource": "*",
            "Effect": "Allow"
        },
        {
            "Action": [
                "S3:PutObject"
            ],
            "Resource": "*",
            "Effect": "Allow"
        },
        {
            "Action": [
                "codecommit:CancelUploadArchive",
                "codecommit:GetBranch",
                "codecommit:GetCommit",
                "codecommit:GetUploadArchiveStatus",
                "codecommit:UploadArchive"
            ],
            "Resource": "*",
            "Effect": "Allow"
        },
        {
            "Action": [
                "codedeploy:CreateDeployment",
                "codedeploy:GetApplicationRevision",
                "codedeploy:GetDeployment",
                "codedeploy:GetDeploymentConfig",
                "codedeploy:RegisterApplicationRevision"
            ],
            "Resource": "*",
            "Effect": "Allow"
        },
        {
            "Action": [
                "elasticbeanstalk:*",
                "ec2:*",
                "elasticloadbalancing:*",
                "autoscaling:*",
                "CloudFormation:*",
                "CloudFormation:*",
                "iam:PassRole"


            ],
            "Resource": "*",
            "Effect": "Allow"
        },
        {
            "Action": [
                "lambda:InvokeFunction",
                "lambda:ListFunctions"
            ],
            "Resource": "*",
            "Effect": "Allow"
        },
        {
            "Action": [
                "opsworks:CreateDeployment",
                "opsworks:DescribeApps",
                "opsworks:DescribeCommands",
                "opsworks:DescribeDeployments",
                "opsworks:DescribeInstances",
                "opsworks:DescribeStacks",
                "opsworks:UpdateApp",
                "opsworks:UpdateStack"
            ],
            "Resource": "*",
            "Effect": "Allow"
        },
        {
            "Action": [
                "CloudFormation:CreateStack",
                "CloudFormation:DeleteStack",
                "CloudFormation:DescribeStacks",
                "CloudFormation:UpdateStack",
                "CloudFormation:CreateChangeSet",
                "CloudFormation:DeleteChangeSet",
                "CloudFormation:DescribeChangeSet",
                "CloudFormation:ExecuteChangeSet",
                "CloudFormation:SetStackPolicy",
                "CloudFormation:ValidateTemplate",
                "iam:PassRole"
            ],
            "Resource": "*",
            "Effect": "Allow"
        },
        {
            "Action": [
                "codebuild:BatchGetBuilds",
                "codebuild:StartBuild"
            ],
            "Resource": "*",
            "Effect": "Allow"
        }
    ],
    "Version": "2012-10-17"
}
Ensure you edit your trust relationship as this is not automatically created in this case. Paste the following under ‘Policy Document’ and click Update Trust Policy.

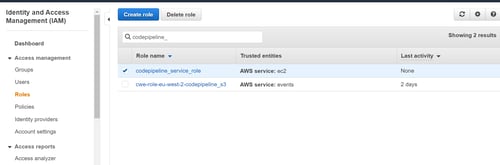
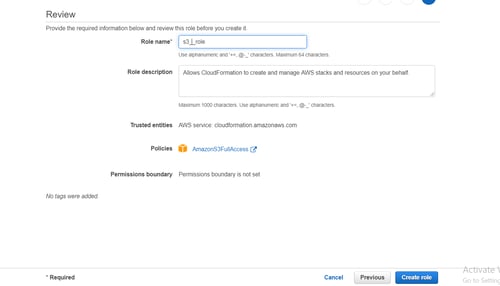
As mentioned above, we need to create 2 roles. The next role is specifically for CloudFormation to access your services. In this case, you’ll be giving CloudFormation full access to your S3 services, and like before, mention any tags you may need before moving on and creating the role.


Under the ‘Services’ tab, you will be able to edit your Pipeline settings. First, create a CodePipeline mentioning your Pipeline name, then attach the service role we first created.
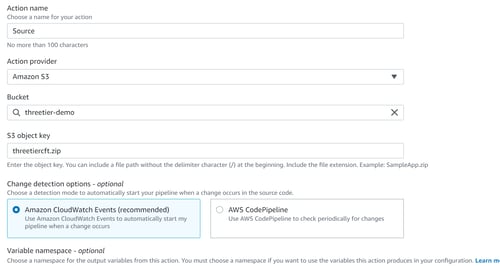
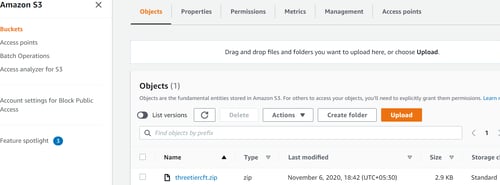
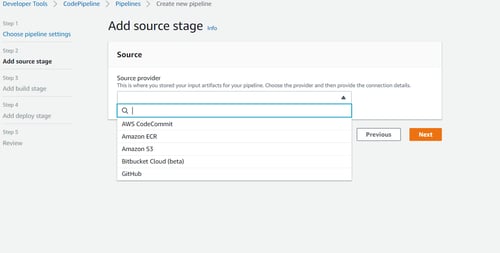
Our next step will be to select a source stage, in this example, we’ll be using S3 for our code, but the option to select Amazon S3, GIT Hub,AWS CodeCommit, and Amazon ECR is also available.
In is case we are choosing S3 bucket name where our Cloudformation template is saved
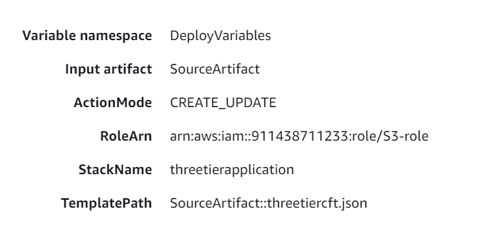
If you plan on going directly to a deployment stage, the build stage is optional in this case. Choose CloudFormation as your deploy provider and the region for your deployment. For this example, our Action mode will be ‘Create or update a stack’.
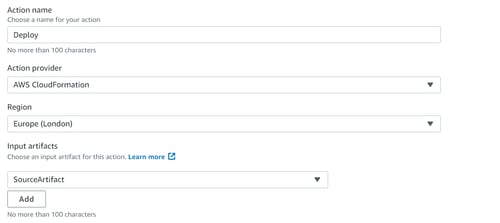
Finally, mention your Stack name, Artifact name, and the file name of your S3 bucket anme and upon choosing next, the option to create your pipeline will be available.

Open CloudFormation in your AWS Console to confirm that your stack has been created.
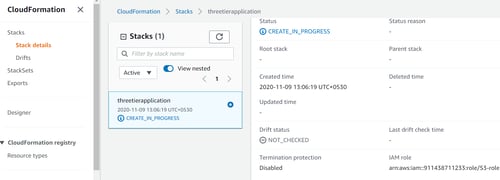
And that’s all there is to it! You now have your template deployed and your stack created for your CI/CD pipeline
Your 3 three application is deployed once Cloudformation will be completed with VPC, Public and Private Subnet, Internet Gateway, Bastion host, Application server, RDS database , security group , NACL, ALB etc. .
Sample web application are up now:-

Your “Zero click Deployment” of Three Tier network diagram for Webapplication is ready -
Related reads


About Coforge
We are a global digital services and solutions provider, who leverage emerging technologies and deep domain expertise to deliver real-world business impact for our clients. A focus on very select industries, a detailed understanding of the underlying processes of those industries, and partnerships with leading platforms provide us with a distinct perspective. We lead with our product engineering approach and leverage Cloud, Data, Integration, and Automation technologies to transform client businesses into intelligent, high-growth enterprises. Our proprietary platforms power critical business processes across our core verticals. We are located in 23 countries with 30 delivery centers across nine countries.