-1.jpeg?width=1813&height=490&upsize=true&upscale=true&name=Artefact%203%20(4)-1.jpeg)
ServiceNow App Engine Studio (AES) was first introduced in Quebec to address enterprise low-code development needs by allowing citizen developers to build applications with the help of templates and guidance-driven flows. AES has been continuously evolving since it was first introduced by ServiceNow. With Tokyo release AES has been enhanced with a lot of new features to cater to the designing of applications with low/no code, supplemented by its Next Experience UI. This blog takes you through creation of a blogging application, which we will call “Snogger”. Let’s begin:
Step1: Create a new application in App Engine Studio. Click on ‘Create App’
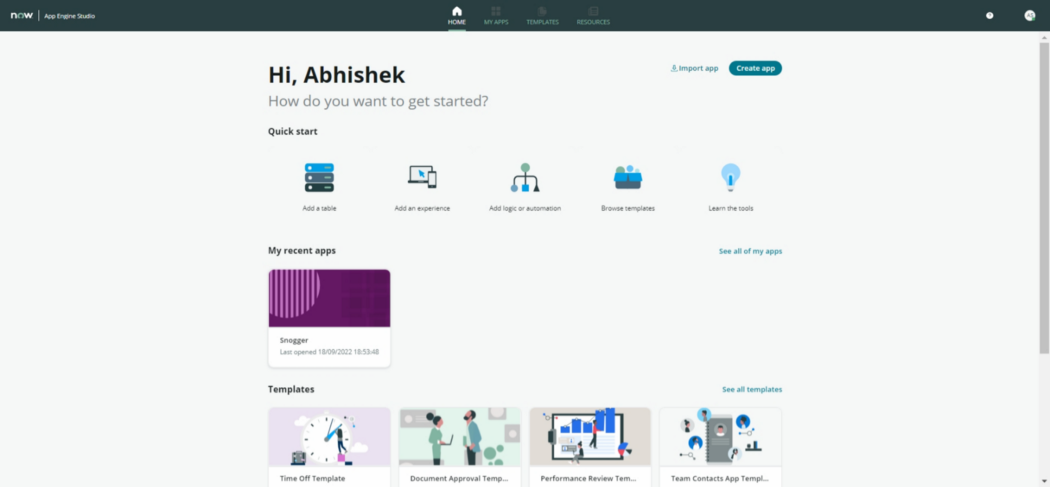
Fig 1. AES Interface
Enter the required details of your app and click on continue. On the next screen click on continue to proceed with default roles.
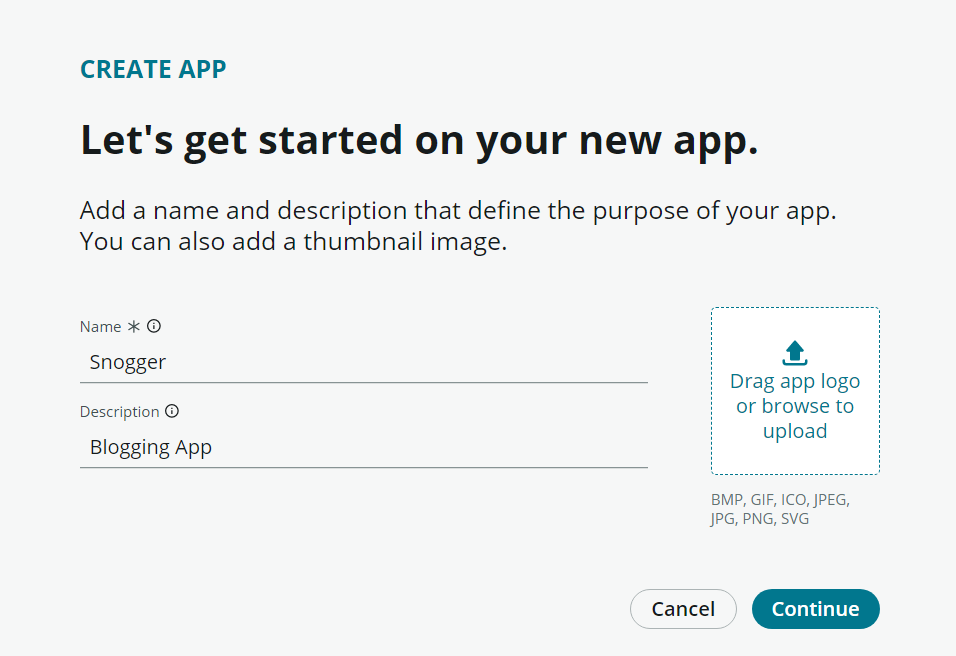
Fig 2. App Name Screen
Enter Basic Information for your App
Step2: Add data to your app.
After completing Step 1 you should see below screen. Click on ‘Go to app dashboard’ button to navigate to App Engine studio environment.
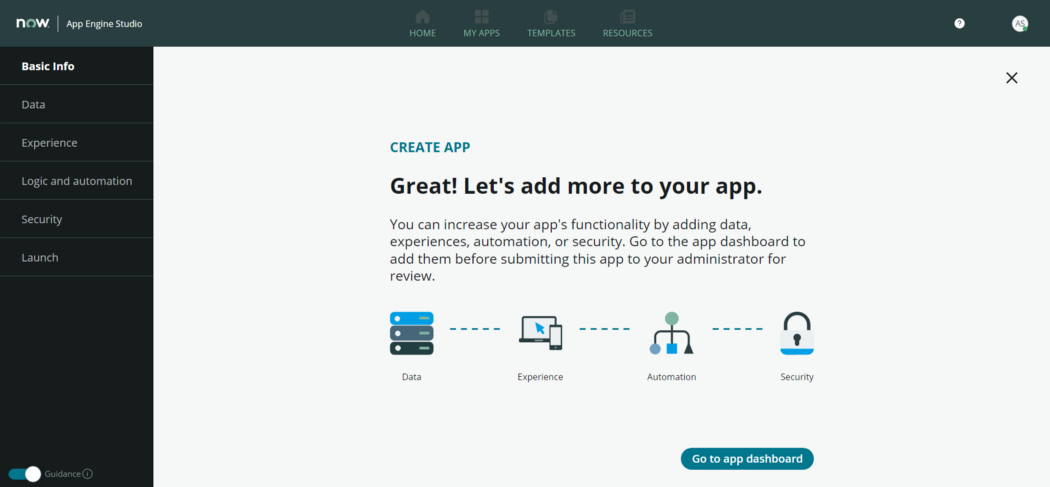
Fig 3. App creation confirmation screen
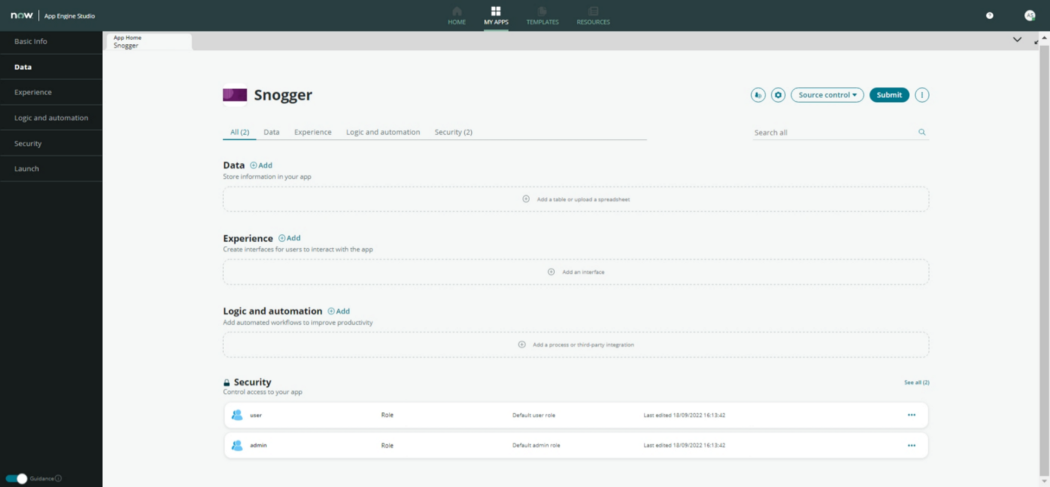
Fig 4. App Engine Studio Environment
Add Data to your app by clicking on ‘Add’ and then select ‘create a table’ option. Table can be created in 3 ways. For the sake of our example, we will extend an existing table.
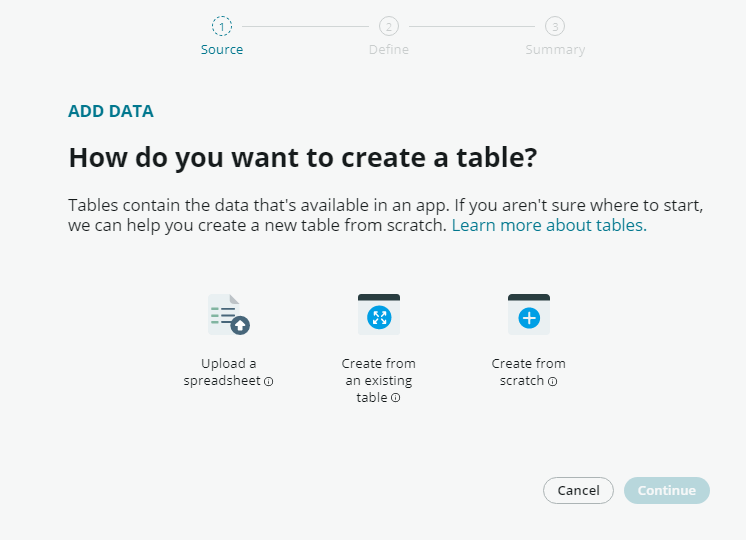
Fig 5. Option to create a new table for your App
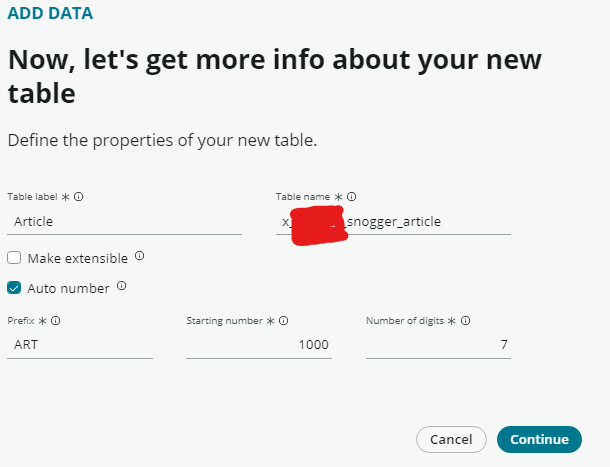
We will extend kb_knowledge table to leverage its workflows and notifications in table. Make sure to enable auto numbering in the extended table. See bellow screenshot for reference.
Provide appropriate access to the default roles in the new table. For our Snogger app, we gave full access to Admin role & complete access, with the exception of deletion rights, to User role.
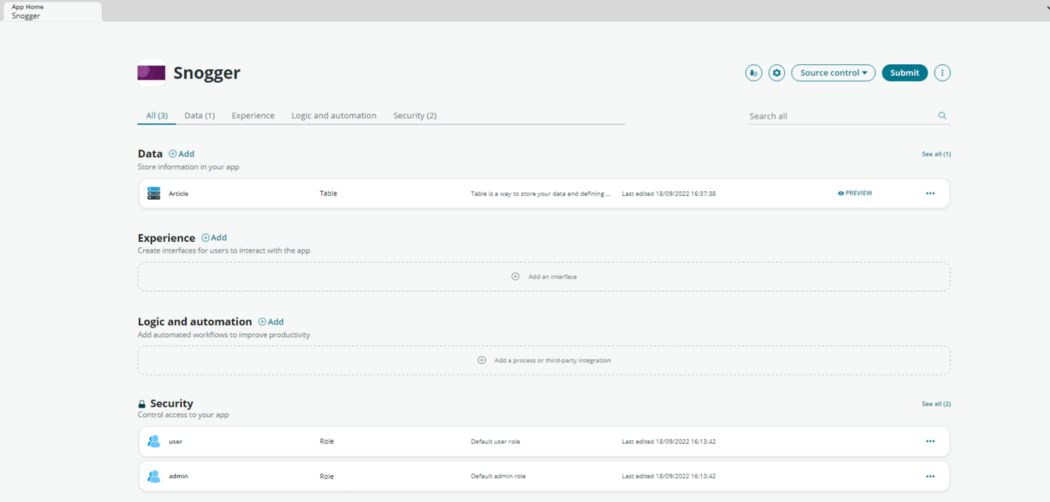
Fig 6. Snogger App Details
Extended table appears under data section
Step 3: Add an experience for application.
To add an experience, click on ‘add’ option next to experience. We will add a record producer to enable users to add Snoggs.
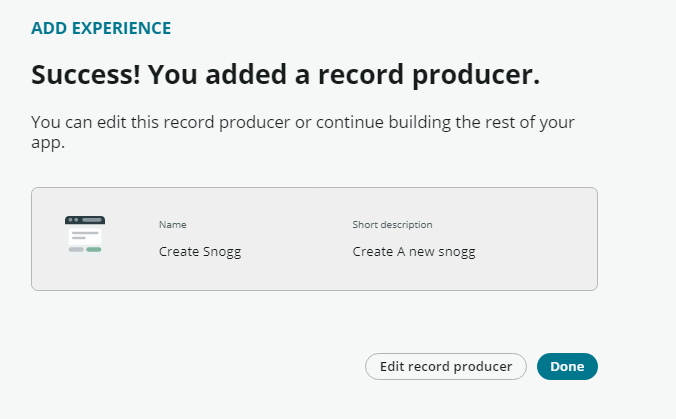
Fig 7. Add Experience
Record Producer added successfully
Now edit the record producer in catalog builder to add variables and map them to field in table.
Step 4: Add a mobile experience for your App.
We will now add a Mobile experience to enable users to view Snoggs in NOW mobile app.
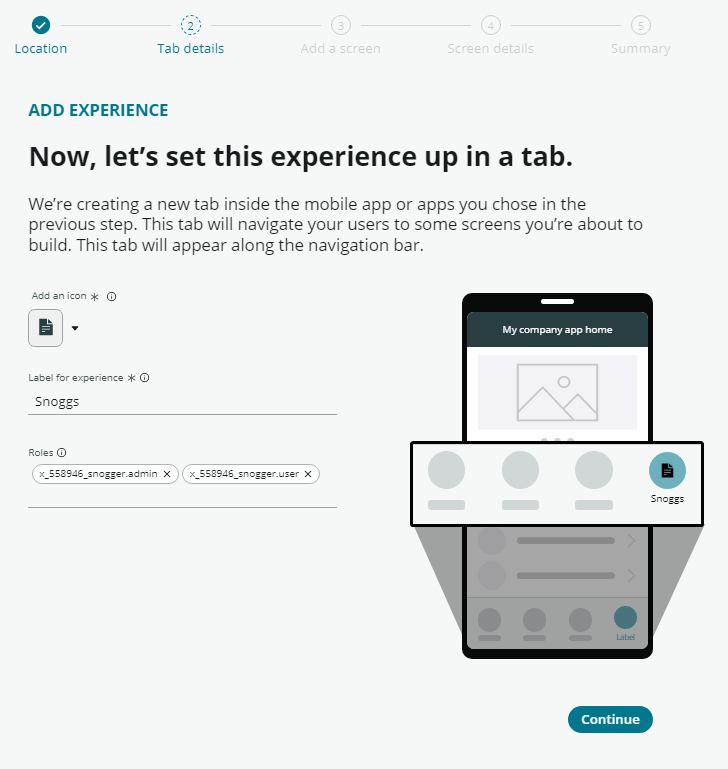
Fig 8. Add Mobile Experience
Add a list view to screen, then select data source table for your list. When you are done creating experience you will receive below confirmation screen.
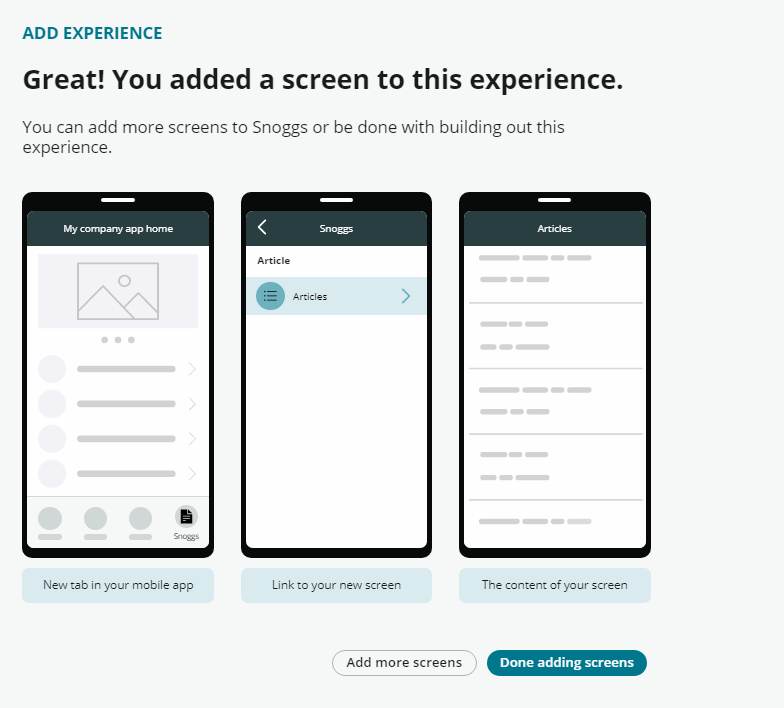
Fig 9. Snogger App Mobile Screens
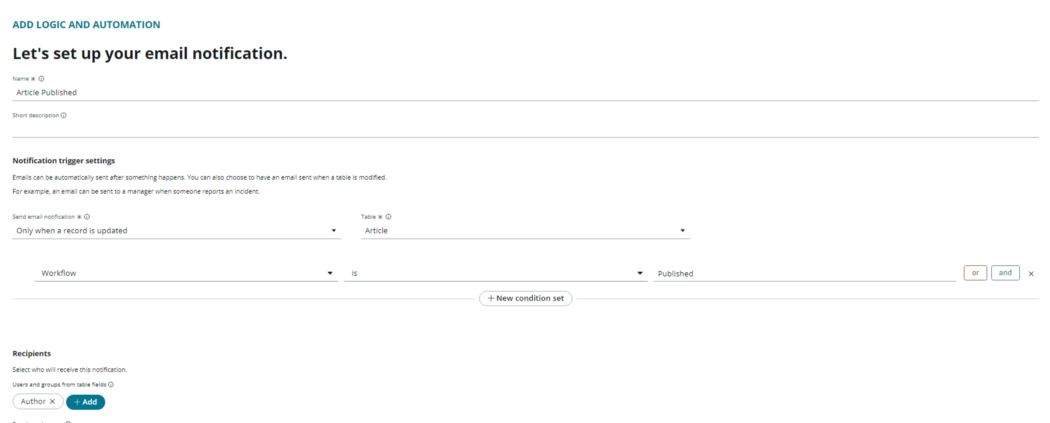
Step5: Add a Logic or Automation to your App.
We will add Email Notification to our app which will be sent after the Article is published.
We are now ready with our Record Producer where user can create new articles and a Mobile App for users to view published articles.
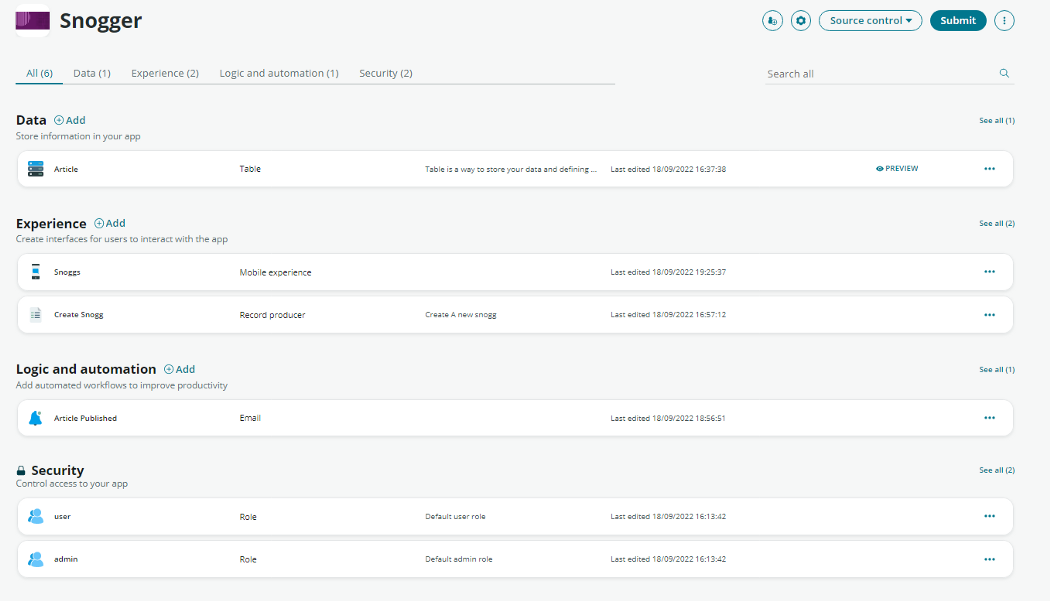
Fig 10. Complete View of Snogger App
The final Application will look like this:
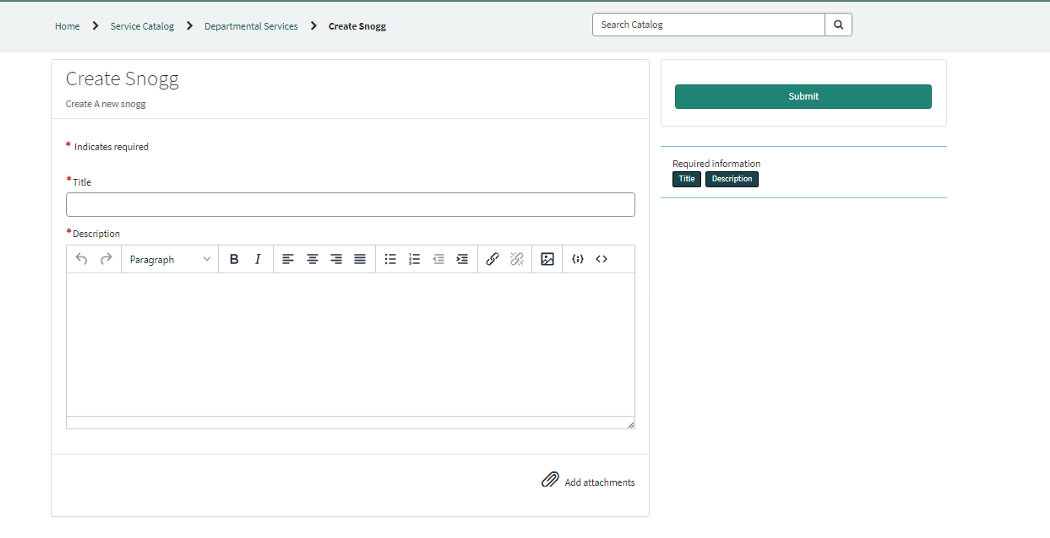
Fig 11. Snogg Creation Page
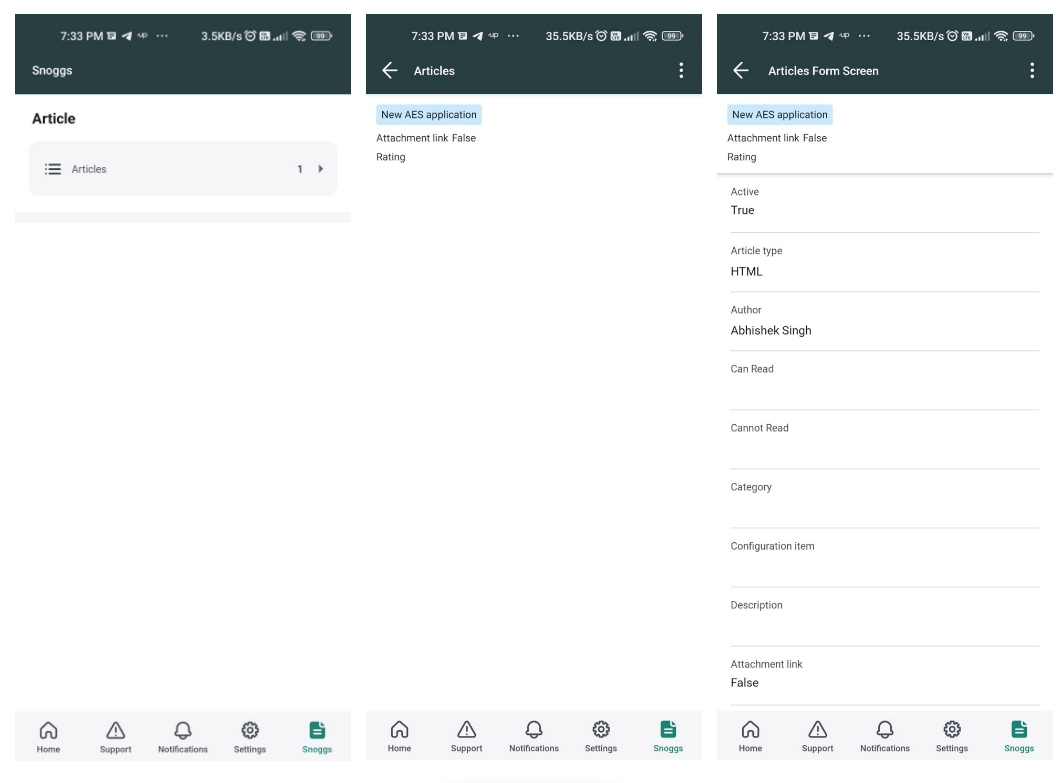
Your Mobile Experience will appear like below screen shots:
Here it is. Just five simple steps and you have a fully functional blogging application, that you can use on-the-go.
Coforge has been using various no-code, low-code platforms to create digital workflow apps. With ServiceNow App Engine taking centre stage, these digital solutions can be created faster and cheaper while conforming to enterprise standards when it comes to security and scalability.

Abhishek joined Coforge ServiceNow team in 2020. Since then, he has worked for several customers and won many accolades. He has amazing technical acumen. He is ServiceNow, RHCE, RHCoE Ansible, RHCSA certified. According to him, “I am a developer, who believes in integrating 2 worlds to work as one”.
Related reads


About Coforge
We are a global digital services and solutions provider, who leverage emerging technologies and deep domain expertise to deliver real-world business impact for our clients. A focus on very select industries, a detailed understanding of the underlying processes of those industries, and partnerships with leading platforms provide us with a distinct perspective. We lead with our product engineering approach and leverage Cloud, Data, Integration, and Automation technologies to transform client businesses into intelligent, high-growth enterprises. Our proprietary platforms power critical business processes across our core verticals. We are located in 23 countries with 30 delivery centers across nine countries.